
Creating a 3D model once required specialized software, manual modeling skills, and hours of technical work. Today, online AI tools can generate an initial 3D model from a product photo, concept image, or digital illustration, making the process more accessible to designers, marketers, game developers, and small businesses.
The result is not automatically ready for manufacturing or professional animation. However, it can provide a useful starting point for visual reviews, product presentations, interactive previews, and creative prototyping.
Key Takeaways
- A clear image with a simple background usually produces a more usable 3D result.
- Online image-to-3D tools are best for visualization and early prototyping, not precise engineering.
- The generated mesh, textures, scale, and hidden surfaces should always be reviewed.
- The correct export format depends on whether the model will be used for games, web previews, editing, or 3D printing.
What Does Image-to-3D Conversion Actually Do?
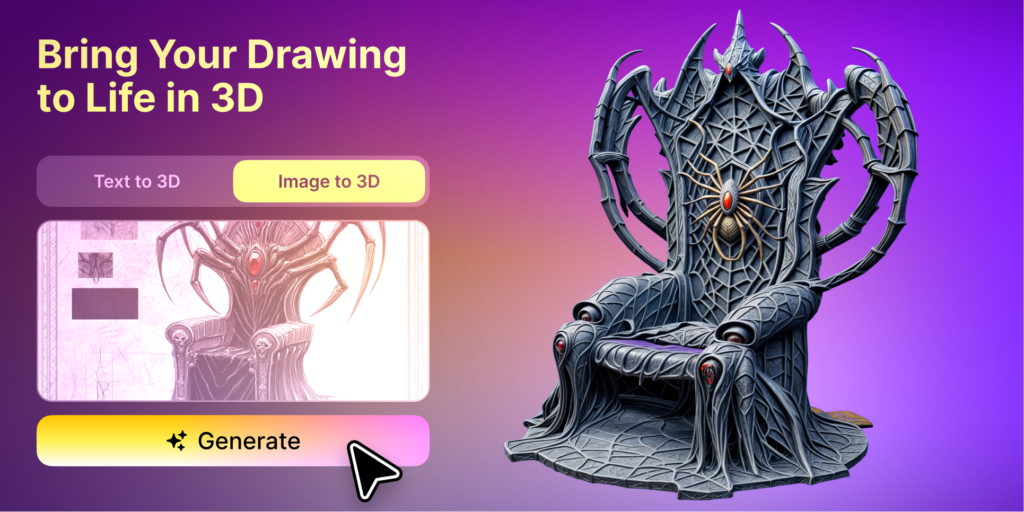
Image-to-3D conversion uses software to estimate the shape, depth, surface details, and appearance of an object shown in a two-dimensional image. It then creates a digital mesh that can be rotated and viewed from different angles.
A photo only shows the surfaces visible to the camera. The software therefore has to predict what the sides, rear, and hidden areas may look like.
This means the generated result is partly based on the source image and partly based on automated interpretation. Simple objects with clear shapes are generally easier to reconstruct than transparent, reflective, thin, or heavily detailed subjects.
The process can be useful for:
- Product concept visualization
- Game props and environmental assets
- E-commerce previews
- Educational projects
- AR and VR prototypes
- 3D printing experiments
- Marketing presentations
- Early design reviews
Which Images Work Best for 3D Generation?
The best input image clearly separates one subject from its background and shows enough of the object’s shape to support a reasonable reconstruction.
Before uploading an image, check the following points:
- The entire object is visible.
- The image is not blurry.
- The background is simple.
- The object is not covered by text or other elements.
- The lighting does not hide important details.
- The edges are easy to identify.
- The subject is shown from a useful angle.
A three-quarter view can be more informative than a completely flat front view because it reveals some depth. However, front and side references may be more useful when proportions need to be checked carefully.
Avoid using images where multiple objects overlap. The tool may incorrectly combine them into one mesh or misinterpret where one object ends and another begins.
How Can You Turn an Image into a 3D Model Online?
You can create an initial 3D model by preparing a clean image, uploading it to an online generator, reviewing the result, refining obvious problems, and exporting it in a format suited to your next tool.
A practical workflow includes five steps.
Step 1: Prepare the Source Image
Crop the image so that the main object occupies most of the frame. Remove unnecessary text, logos, borders, or background elements when possible.
You may also need to adjust brightness or contrast if important edges are difficult to see. Do not over-edit the image, since extreme filters can remove surface details that help describe the object.
Step 2: Upload the Image to an Online Tool
Open an image-to-3D platform and upload the prepared reference. Some tools provide different generation modes for realistic, stylized, detailed, or lower-polygon results.
For example, Meshy AI provides an online workflow for converting a reference image into a textured 3D model that can be previewed and exported for further use.
At this stage, focus on selecting an appropriate source image rather than trying to correct every detail through settings. A weak input image cannot always be fixed by choosing a more advanced generation option.
Step 3: Generate and Inspect the Model
Once the model has been generated, rotate it slowly and inspect it from all directions.
Do not evaluate the result only from the same angle as the original image. The front may look accurate while the back contains distorted geometry or invented details.
Ask these questions:
- Does the silhouette match the source image?
- Are the main proportions correct?
- Does the rear of the model look believable?
- Are small parts missing?
- Are any surfaces fused together?
- Does the texture align with the geometry?
- Is the model too detailed for its intended use?
If the overall shape is incorrect, generating a new version from a clearer image may be more effective than manually repairing the entire mesh.
Step 4: Refine the Geometry and Texture
An automatically generated model may contain uneven geometry, unnecessary polygons, stretched textures, or incomplete surfaces. The amount of cleanup required depends on the final use.
A model intended for a quick presentation may need little editing. A game asset, animated character, or 3D-printable object usually requires a more careful review.
Common refinement tasks include:
- Removing disconnected geometry
- Closing holes
- Correcting surface normals
- Simplifying dense areas
- Separating individual parts
- Adjusting proportions
- Improving UV mapping
- Replacing distorted textures
- Reducing the polygon count
- Setting a useful origin point
Programs such as Blender can be used for further editing when the online output needs more control.
Step 5: Export the Correct File Format
The best format depends on what you plan to do with the model.
| Format | Common use |
| GLB | Web previews, sharing, AR and compact textured assets |
| FBX | Game engines, animation and production workflows |
| OBJ | Basic geometry exchange and static models |
| STL | 3D printing |
| 3MF | 3D printing with additional model information |
| BLEND | Continued editing in Blender |
| USDZ | AR experiences on supported Apple devices |
Before exporting, confirm whether textures are embedded in the file or downloaded separately. An OBJ file, for example, may require additional material and texture files to display correctly.
What Should You Check Before Using the Model?
Before using an AI-generated model, check whether it is visually accurate, technically compatible with your software, and appropriate for its intended purpose.
Use this checklist:
Shape and Proportions
- Does the object match the original reference?
- Are major features in the correct positions?
- Does it look reasonable from every angle?
Mesh Quality
- Are there holes or overlapping surfaces?
- Is the polygon count appropriate?
- Can the model be edited without major problems?
Texture Quality
- Are the colors placed correctly?
- Are there visible seams or stretched areas?
- Does the material look consistent under different lighting?
Scale and Orientation
- Is the object facing the correct direction?
- Is its size reasonable after import?
- Is the origin point located where it will be useful?
File Compatibility
- Can the target software open the format?
- Are the textures included?
- Does the model retain the expected appearance after import?
Usage Rights
- Are you allowed to use the source image?
- Does the tool’s license permit your intended personal or commercial use?
- Are attribution or account-level restrictions involved?
When Is an Online Image-to-3D Tool Most Useful?
Online image-to-3D tools are most useful when speed and visual exploration matter more than exact technical control.
They can help a designer turn a sketch into a model for a concept review. A small business can create an early product visualization before commissioning detailed CAD work. A game developer can test whether a prop fits the visual direction of a scene.
They are also useful for people who do not yet have advanced modeling skills but need a three-dimensional starting point.
Suitable use cases include:
- Early product concepts
- Background game props
- Educational demonstrations
- Presentation graphics
- Simple web viewers
- Design variations
- Marketing mockups
- Initial AR tests
When Should You Use Traditional 3D Software Instead?
Traditional 3D software is still necessary when the project requires precise dimensions, controlled topology, mechanical design, advanced animation, or production-level optimization.
An AI-generated visual model should not be treated as a manufacturing file simply because it looks realistic.
Use professional CAD or modeling software when you need:
- Exact measurements and tolerances
- Mechanical assemblies
- Structural analysis
- Manufacturing drawings
- Clean animation topology
- Detailed character rigging
- Strict game-performance targets
- Complex material control
- Regulatory or safety validation
A hybrid workflow is often the most practical solution. AI creates the initial form, while a designer or 3D artist handles the technical refinement.
How Can You Improve Weak Image-to-3D Results?
You can improve weak results by simplifying the input image, providing a clearer angle, removing visual distractions, or generating several versions before choosing one to refine.
Try these adjustments:
- Replace the background with a plain color.
- Increase the visibility of the object’s edges.
- Use a higher-quality reference image.
- Avoid extreme perspective distortion.
- Separate overlapping parts.
- Try a three-quarter view.
- Provide multiple views when supported.
- Generate more than one version.
- Edit the best result instead of expecting a perfect first output.
Some objects remain difficult even with strong references. Transparent glass, reflective metal, thin wires, complex hair, and soft fabric may need significant manual correction.
Frequently Asked Questions
Can I create a 3D model from one photo?
Yes, but the tool must estimate all surfaces that are not visible in the photo. A single image can be enough for a concept model, while multiple views generally provide more information for accurate reconstruction.
Is an AI-generated model ready for 3D printing?
Not always. The mesh should be checked for holes, non-manifold geometry, wall thickness, scale, and structural stability before it is sent to a slicer or printer.
Can I edit the generated model in Blender?
Yes, provided the model is exported in a format supported by Blender, such as FBX, OBJ, GLB, STL, or BLEND.
Which file format should beginners choose?
GLB is convenient for previewing and sharing textured models. FBX is useful for many game and animation workflows, while STL is commonly used for 3D printing.
Can an online tool replace a professional 3D artist?
It can reduce the time needed to create an initial model, but professional skills remain important for art direction, geometry cleanup, animation, optimization, and production-ready results.
What Is the Best Way to Start?
Start with one simple object and a clear image rather than a complex scene. Generate the model, inspect its hidden surfaces, and test it in the software where you plan to use it.
The real value of an online image-to-3D tool is not that every result is immediately finished. It is that creators can move from a flat reference to an editable 3D starting point more quickly, then apply the level of manual refinement their project actually requires.

Anna Hans
Anna leverages her expertise in AI and marketing to craft engaging, impactful content that resonates with audiences and drives results.
View all postsComments 0
No comments yet. Start the conversation!